
How To Use Tile Leveling System
1. SET THE PLIERS
Set the pliers to the scale according to the ceramics thickness.
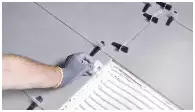
2. PLACE THE CROSSHEAD
Spread the glue cement and then lay the first tile at the level. Introduce the crossheads at the ends of the tile. (approx. 50mm).
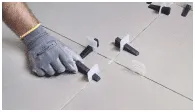
3. INTRODUCE THE WEDGES
When laying the adjacent tiles, introduce the wedges in the crossheads manually.
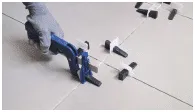
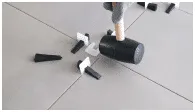
4. TIGHTEN
Rest the pliers as shown in the image and tighten to the maximum to level the tiles before the glue sets.
5. TAP GENTLY
When the tile is leveled, we recommend hitting gently to release tensions.
6. ALLOW FOR SETTING
When the surface is finished, allow the glue to set for the time recommended by the manufacturer.

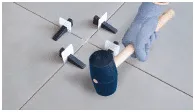
7. REMOVE THE SYSTEM
After the necessary time, remove the crossheads by hitting on them with a rubber mallet or with your foot in the direction of the joint (do not hit the wedges). The crosshead will always break by the side cuts, under the tile.
8. REUSABLE WEDGES
Finally, remove the wedges, the rest of the crosshead and grout the tiles.
